Fig Anise Dutch Oven Bread
Have you ever tried Terra Breads? In Vancouver, that is one of our favorite brands of bread. They even sell them at Save-On Foods now. We love all the ones we have tried like their French baguette, olive breads, and fig anise breads. It will cost you around $5 for a relatively small loaf though. That's expensive to us but then again, we're still used to our cheap great bread days back in Paris :)
When I started making artisan bread with my dutch oven, I fell in love with the idea of making my own bread. In fact, that blog post is my third most visited blog post to date. Even when I mess up here and there, the bread still comes out alright. It really is a fool proof recipe! I credit my dutch oven for baking it like magic every time.
 |
| First attempt: Looked great but didn't taste right. |
Last week, I decided to tackle one of our favorite flavored breads from Terra Breads: fig anise bread. I didn't expect it to be exactly the same but this bread served as my main inspiration. My first attempt looked great as usual but the taste was totally off. I added too many anise seeds and that made it somewhat bitter. We ate it with lots of honey and then it tasted great. Lol. My husband said it was still good. The bitterness of it bothered me though. I was determined to improve on it right away so this week I made it again. I knew exactly what I wanted to change and couldn't wait to experiment. It's a good thing we bought a giant bag of dry figs from Costco!
The results? Well, obviously good otherwise I wouldn't be here blogging about it! :) No seriously, it was DELICIOUS. Especially, if you eat it with a bit of butter or a bit of honey (wink, wink ;). I absolutely love it with a bit of both butter and honey. I made this bread for our breakfast so I tried to keep it tasty but somewhat plain as well since we would likely toast and then put butter or jam on it. It tastes good alone as well but if you really just want to eat it on its own, then I would recommend making it a bit sweeter.
 |
| Second attempt: Success! |
We served the fig anise bread tonight with some soy cheese. It was actually pretty good, even with soy cheese. Lol. I think it would be awesome topped with brie or cream cheese and then drizzled with a bit of organic honey. Sweet and savory goodness. I'm drooling just thinking about it. I sort of want to bake this bread again next week, except that would make it three of the same bread back to back. Our family lives for food variety so I probably should move onto my next bread project :) Sigh. I'm so glad I have this blog to document my food experiments. Even if no one comes to my blog to make this, I know I certainly will :)
 |
| Add figs last. |
 |
| Done. Now we wait. |
 |
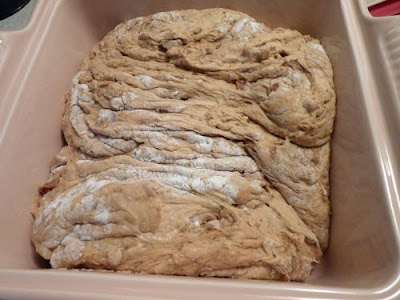
| 18 hours later. |
 |
| Flour it well, wrap and let it rise another 2 hours. |
 |
| And in the hot oven it goes! |
 |
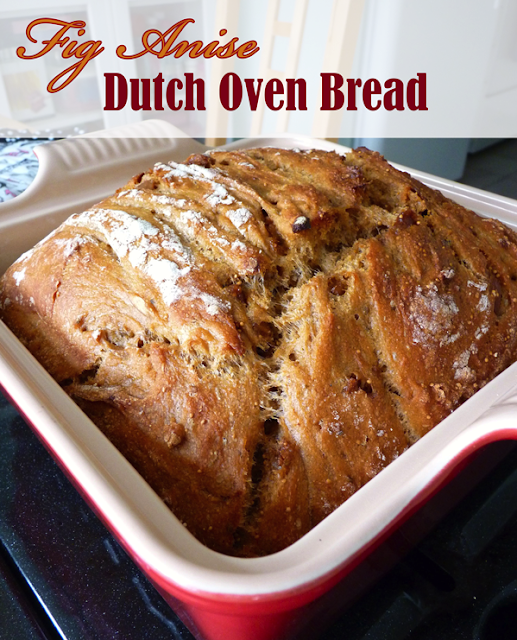
| Done. What a cool looking bread! |
 |
| See all those fig pieces? |
Fig Anise Dutch Oven Bread
Serves 8
3 cups flour
3 cups whole wheat flour
2 tbsp wheat gluten
1 tbsp salt
2 tbsp muscovado sugar
1 tbsp anise seeds
2 tbsp molasses
1/2 tsp active dry yeast + 2 tbsp warm water
3 1/3 cup cold water
3/4 to 1 cup dry figs, soaked and cut into small chunks
1/3 to 1/2 cup flour for forming into a ball later
Add the yeast to the luke warm water and let it sit in a cup. Measure and combine the flours, gluten, salt, sugar, anise seeds, molasses in a large bowl. Add the cold water. Stir the yeast mixture a bit and then add the yeast to the large bowl as well. Using a big fork or dough hook, just mix it all up until all the flour is incorporated. Add figs and mix some more until evenly distributed. Cover with saran wrap and let it sit at room temperature for around 18 hours.
Use the 1/3 to 1/2 cup of flour to flour your hands and the dough so that you can work it into a rough ball. Dust the parchment paper with flour. Lay the dough on it and dust the dough with more flour. Wrap this entirely with parchment paper and then wrap over with a clean kitchen towel. Let this sit for around 2 hours so it can double in size.
Preheat oven to 425 F with your dutch oven inside. When the temperature is reached, remove the dutch oven and carefully dump the dough inside. The dough will likely stick on some parts of the parchment paper but try your best to get all of the dough into the dish. Bake covered for 45 minutes. Remove the cover and bake for another 10 minutes. Broil for another 2 minutes, if you need to brown the top a bit. Take out the bread and let it cool for about 15 minutes. Remove the bread from the dutch oven and let it cool further on a cooling rack.


Interested in trying this, but I would need a dutch oven first =)
ReplyDeleteThere are workarounds in the comments section of the previous bread post (http://www.swoonforfood.com/2012/12/easy-homemade-artisan-bread-to-impress.html), if you don't have a dutch oven. I would highly recommend investing in one though :) Everyone who has made this bread has fallen in love with it!
Delete